

Mac users have a dilemma! The platform’s two most popular word processors are pre-configured to use fonts people generally do not want to use. Folks who need Times New Roman to be the default font have to do some tweaking.
One of the most common questions Mac users have is how can they change the default font in Word and Pages? You’d think this would be a quick preference to switch in each program, but it’s not quite that easy. This is because the software itself does not decide what font to use when a new document is opened. Instead, it depends on a template to create each document and determine the formatting details. With that background information out of the way, let’s get into how to make this happen.
Microsoft Office 2008 – Word
Microsoft’s popular word processor got a new default font called Calibri in Office 2008 for Mac. Why they decided to do that is beyond me. Good thing Times New Roman is only a few clicks away. Here’s how to do it:
- Open a new blank document in Word 2008.
- Select Format > Font in the menu bar.
- Choose Times New Roman (or another font, if you prefer), Regular, 12pt.
- Click the Default button in the lower-left corner of the window.
- A message will be displayed warning that the “NORMAL” template will be changed. Click Yes to accept and then OK to close the Fonts window.

Apple iWork ’09 – Pages
Much like Word, Apple’s Pages software uses templates to format new documents. However, the default font in this case is Helvetica. Since Pages is a hybrid word processor / page layout program, Helvetica works in some creative situations. Still, writing professional documents or school papers usually requires Times New Roman and it’s a pain to change it every time.
- Open a new blank document in Pages ’09.
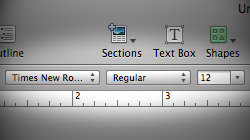
- Choose Times New Roman from the font drop-down menu on the main toolbar.
- Select File > Save as Template in the menu bar.
- Give the template file a name of your choice and save it in the My Templates folder.
- Go to Pages > Preferences and click on the General tab.
- Select “Use Template” under For New Documents, then click the Choose button.
- In the Template Chooser, go to the “My Templates” heading in the left navigation menu. Choose the template you created earlier and close the Preferences window.

Now you’re back in business without that pesky default font problem! When you open a new document in Word or Pages, Times New Roman will already be set as the font to start.


