

When Mac OS X automatically generates thumbnails for your videos, sometimes it gives you a dud. If you want to choose a frame that better represents the contents of a video, it’s easy to do using QuickTime.
Browsing the videos saved on your Mac’s hard drive is quick and easy now that Cover Flow has been incorporated into Finder. You barely need to look at filenames any more — just flip through the thumbnails and choose what you’re looking for visually. At least that’s the case most of the time. Since Mac OS X usually generates thumbnails based on the first few frames of a video, you may occasionally be left with a thumbnail that’s not very useful for speed browsing.

To give you an example of what I mean, take a look at this folder full of videos on my MacBook Pro. Front and center is a digital copy of Rocky Balboa. Of course, I would only know that by looking at the title because the thumbnail is completely black. The next movie in line is The 40 Year Old Virgin and all you can see is the opening sequence with Universal’s logo. Clearly, neither of these are particularly functional. The good news is we can change these thumbnails to show any part of the movie we want. Here’s how:
- Open the video file in QuickTime and navigate to any frame of your choice. You’ll probably want to pick one that includes some of the main characters or an especially memorable scene.
- Once you have chosen a frame, copy it by either pressing Command+C on your keyboard or going to Edit > Copy in the menu bar.
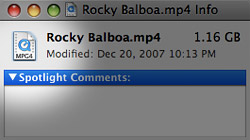
- Go back to Finder where the video is located and right-click on the file. Choose “Get Info” from the menu.
- In the small window that comes up, you will see an icon in the upper left corner. Select the icon (it should have a blue glow effect around it) and paste your copied video frame by pressing Command+V.

It’s that simple! You should now see the thumbnail of your choice in Finder instead of the original automatically generated one.


September 14th, 2009, 9:31 AM
Hey thanks ant,that’s a great tip.
I just moved from OS X Tiger to Snow Leopard and the problem of useless thumbnails for video files was my No.1 pain in the neck problem.
Your tip works great in Snow Leopard,you just have to use Quicktime 7 (Find it in Applications-Utilities Folder-Quicktime 7.If it’s not there you’ll find it on your OS X install disk) and not the new Quicktime X.
Great stuff ant.Cheers!