Getting used to Finder for browsing files is one of the biggest adjustments new Mac users have to make after switching from Windows. Once you’ve got the basics down, check out these tips to bring yourself to the next level.
1.) You might have noticed that Finder displays the size of files on your hard drive, but no such luck when it’s a folder you’re looking at. Instead, a couple dashes (–) are shown in the Size column. You can change this behavior, however, by going to View on the menu bar and choosing Show Options. There you will find an option to “Calculate All Sizes.” This will display the sizes of everything in Finder, whether it’s a file, folder, or whatever else you happen to be stashing away on your Mac. It should be noted that Apple has this option disabled by default for a reason — larger folders may take a little while to calculate and will no doubt put extra strain on your hard drive.

Set Finder to calculate folder sizes
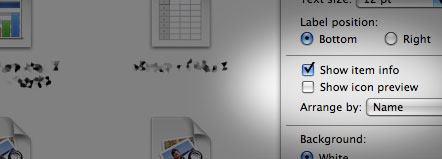
2.) By default, the icon shown to represent a file in Leopard’s Finder is a thumbnail preview of the actual document. If you’d rather see the icon of the application a file is currently set to open in, you can do so by going to View > Show View Options and the unchecking the “Show icon preview” option.

View application icons instead of document thumbnails in Finder
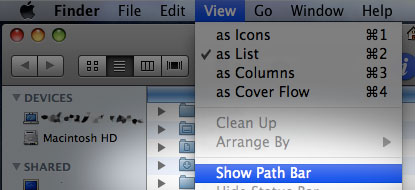
3.) One of the new features introduced in Mac OS X 10.5 Leopard is the Path Bar in Finder. For some reason, though, Apple decided not to enable this useful tool out of the box. Luckily it’s easy to turn on — just go to View > Show Path Bar and it will attach itself to the bottom of the Finder window. Now the location of your currently viewed folder will always be available in breadcrumb format.

Enable Finder’s Path Bar
4.) Part of what makes Mac OS X so user friendly is its extensive use of drag & drop to complete certain tasks. This applies to making tweaks to Finder’s toolbar and sidebar as well. To add any document, folder, or application shortcut to the Finder sidebar or top toolbar, simply drag it from the file browser area to your chosen location. Getting rid of these shortcuts is just as easy. On the sidebar, drag it away from the Finder window and it will disappear in a literal puff of smoke. On the toolbar, right click the icon and select “Remove Item.”

Drag and drop to customize the sidebar and toolbar in Finder
5.) A cool productivity tip I myself just learned is that you can press that tab key on your keyboard to select the next file alphabetically in Finder, regardless of how they are currently sorted. So if you’ve got Finder to sort by Date Modified, hitting tab will still bring you to the next file according to its name. Pressing shift + tab at the same time will select the previous file in alphabetical order.
So there you have it — a handful of things you can do with Mac OS X’s Finder that might not have immediately popped out at you during daily use. What are some other Finder hints or tips you have come across? Let us know in the comments!


November 9th, 2008, 2:58 PM
Good work :) Tnx