Users who run Windows in a virtual machine via Parallels for Mac software don’t get all the speed of a native installation (such as Boot Camp), but there are a couple ways to improve performance.
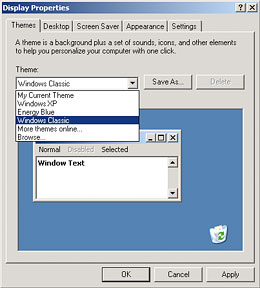
When I’m running Windows XP in my Parallels virtual machine, I immediately notice a strain my MacBook Pro’s system resources. This is inevitable, of course, considering the complexity of the software, but you may be able to minimize these slowdowns with two minor tweaks in Windows. Once you’re in Windows, right click anywhere on the desktop background and choose Properties from the menu. A Display Settings dialogue box will come up. The first thing you can try is going to the Themes tab and selecting Windows Classic in the drop-down menu. What this does is bring you back to the old Windows 98-esque graphical interface. Sure it’s ugly, but it cuts down on the resources needed just to run the operating system.

Go back in time to the Windows Classic theme
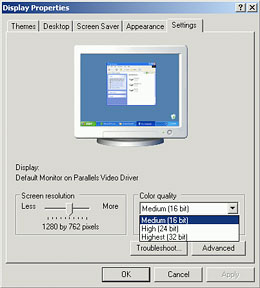
The second change you can make in your Parallels virtual Windows machine is to click on the Settings tab in the same window. You should see a slider to the left that displays your screen resolution, and to the right you should see a drop-down menu for Color Quality. If you’re not using your VM for graphic-related purposes where high quality colors are needed, you can kick this setting down a notch or two. For example, I brought mine down from 32-bit to 16-bit. For the most part, you won’t see too much of a difference besides the occasional crude gradient. However, you probably will notice that, as many Mac users like to say, the application becomes a bit more “snappy” when you decrease this setting.

Drop the color bit level to decrease video memory usage
Related to the subject of increasing performance and freeing up system resources is the amount of hard drive space your Parallels VM occupies on your Mac. Even though you chose the size of your virtual hard drive during the Parallels setup, that doesn’t mean your image file needs to actually be that big. The software offers a great feature you may not know about called Parallels Compressor, which shrinks the size of your disk image file to a more acceptable size. To give you a better idea of what I mean, my installation of Windows XP is set up on a 22GB virtual hard drive. The disk image file for that drive on my Mac, though, is only 16GB after being compressed. This can be quite handy when you’re running low on hard drive space and need to re-gain some of it back.

Use Parallels Compressor to shrink your VM’s footprint
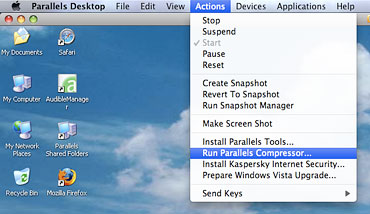
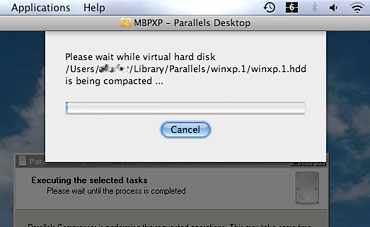
To use this feature of Parallels for Mac, boot up your VM and choose Actions > Run Parallels Compressor in the menu bar. A window will appear with a countdown to select manual mode, but you’ll probably be better off letting it go to automatic mode. Another window will appear with a progress bar and status message, which tells you that automatic updates are being temporarily disabled, temporary system files are being cleared, etc. A restart will be needed when this stage is complete, and once your VM is back up and running the final stage will begin automatically.

Compacted VM = More hard drive space
The disk will be defragmented and compressed with no need for interaction on your part, so feel free to walk away and do something else since it might take a while. A notification box will appear to let you know when it’s done and you should hopefully notice that you now have increased free space on your Mac’s main drive. The exact amount you save will vary greatly with each user, but nearly everyone using Parallels to run Windows on their Mac should benefit from using this tool.


